This post may contain affiliate links. Please see my full disclosure policy for details.
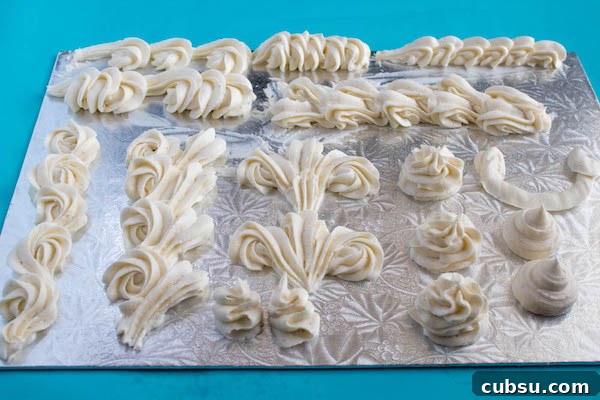
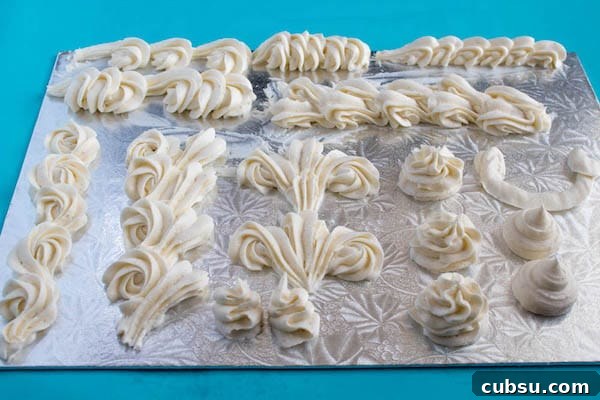
If you’re just getting started with cake decorating, this guide is for you. I’m a self-taught home baker who learned many of these skills through practice and research. One of the most transformative finishing touches is a piped border — it can take a plain frosted cake from basic to beautiful with very little effort. In this tutorial I share 11 easy border techniques you can master quickly to elevate your cakes.
What type of frosting should I use?
Buttercream and royal icing are the most common choices, but the real rule is simple: use any frosting that will hold its shape when piped. For this guide I used my Dreamy Vanilla Buttercream because it pipes smoothly and forms a light crust that helps designs keep their shape even in warm conditions. You can use similar piping-ready frostings, stabilized whipped creams, or chilled ganache as long as they maintain definition when piped.
Tools you’ll need
Basic tools make piping easier and more consistent. Gather a reusable decorating bag or disposable piping bags, a selection of piping tips (large star, large round, petal tips are useful starting points), and a coupler if you want to swap tips without changing bags. A rubber spatula or spoon helps fill bags cleanly, and parchment squares are handy practice surfaces.
How to assemble and fill a piping bag
- Choose your bag and piping tip. Reusable bags are great for larger tips; disposable bags are convenient for smaller tips.
- If using a disposable bag, drop the tip into the bag and note how far it sits — this determines where to cut the bag. If you’re using a coupler, cut the bag to fit the coupler base.
- Fit scissors about 1 inch above the tip, push the tip up, and cut the bag. Don’t cut too much or the tip may fall out.
- If using a coupler, insert the coupler’s base into the bag with the threaded ring removed, then push it to the tip end.
- Place the piping tip over the coupler base and secure it with the coupler ring, tightening so the tip won’t slip.
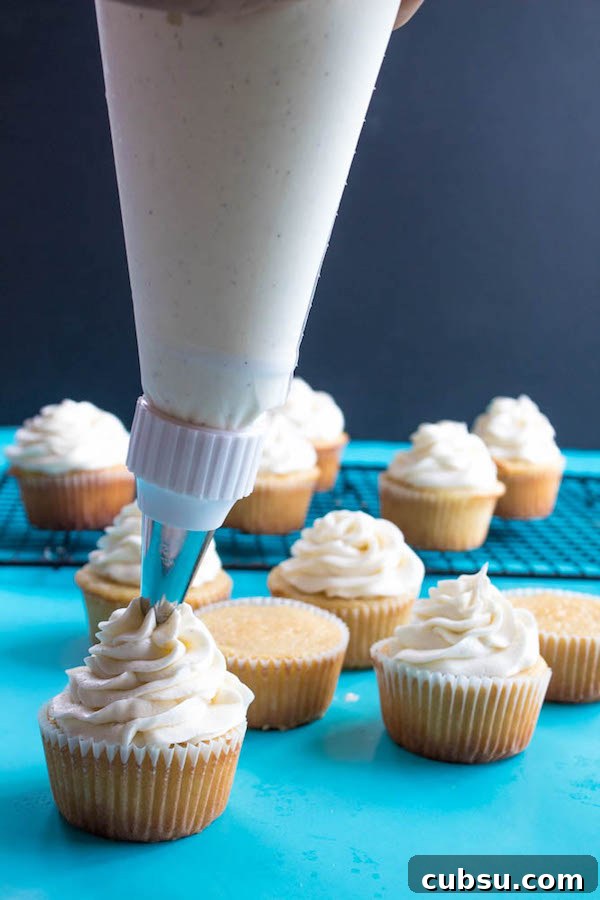
- To fill the bag easily, set the bag inside a tall glass and fold the top over the rim. Spoon or scrape frosting into the bag until it is about three-quarters full.
- Remove the bag from the glass, push the frosting down toward the tip, twist the top to close, and squeeze out a small bit to remove air bubbles before piping.
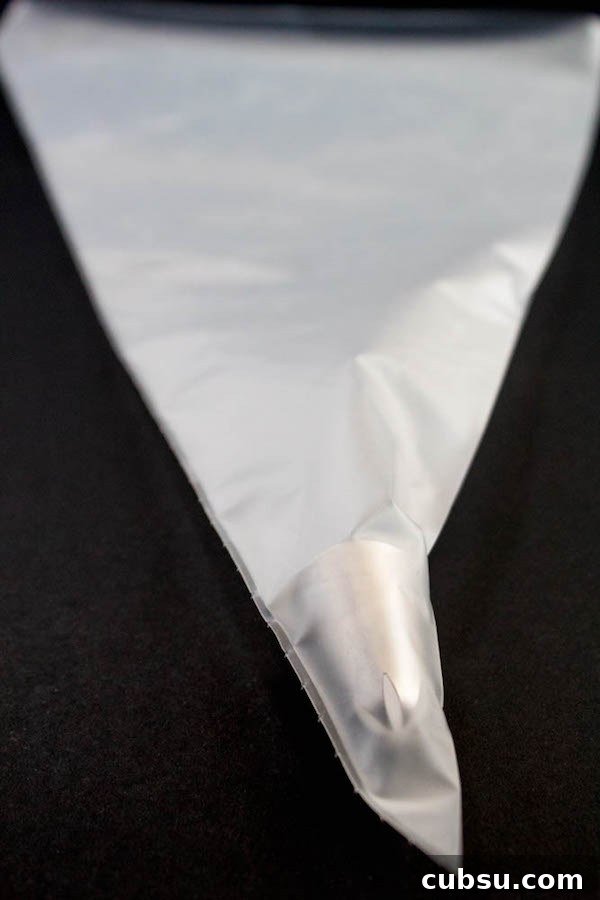
What you need
- Buttercream frosting
- Piping bag (reusable or disposable)
- Large star tip (examples: Wilton 1M, Wilton 6B, Wilton 2D)
- Large round tip (example: Wilton 1A)
- Petal tip for ruffles and banners
- Coupler (optional for changing tips)
- A frosted cake to practice on or parchment paper for trials
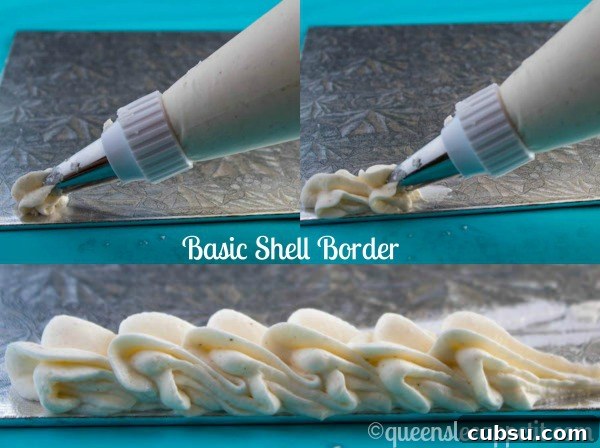
Shell Border
- Hold the piping bag at a 45-degree angle to the cake edge.
- Squeeze and allow the frosting to puff outward into a rounded shell.
- Stop squeezing and drag the tip to form a small tail.
- Start the next shell so the new puff overlaps the tail of the previous shell to create a seamless look.
- Continue around the cake.
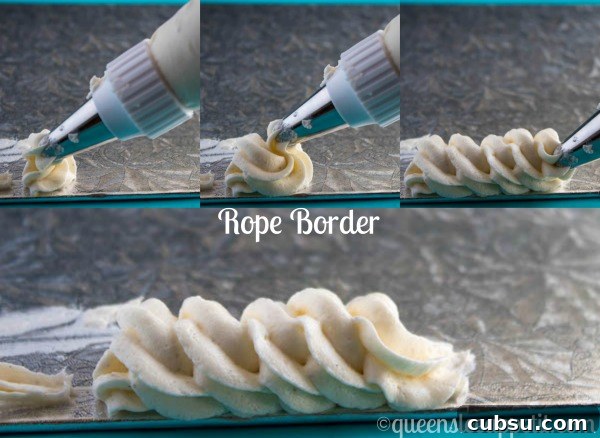
Rope Border
- Hold the bag at a 45-degree angle.
- Squeeze with even pressure and move the bag with a gentle rolling motion to form a twisted rope effect.
- Keep a consistent height and pace for an even rope.
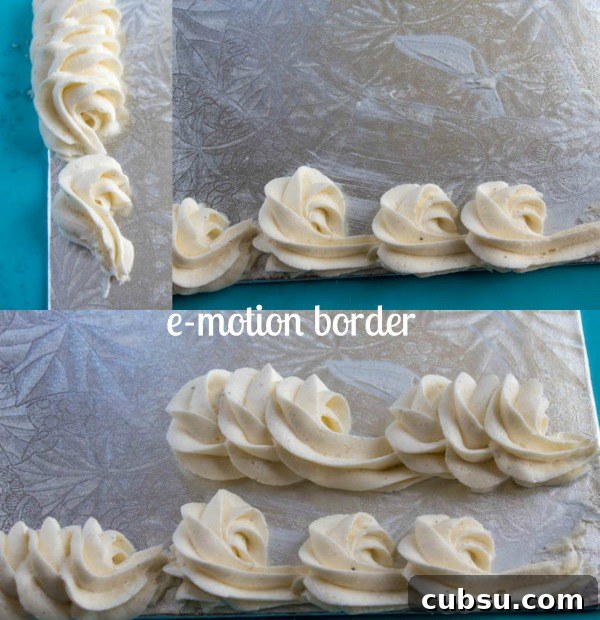
E-motion Border
- Hold the bag at 45 degrees and pipe a continuous lowercase cursive “e” shape while squeezing steadily.
- For a triple e-motion border, pipe three linked “e” shapes and finish with a longer tail to meet the next set.
- Work consistently around the cake to keep the pattern uniform.
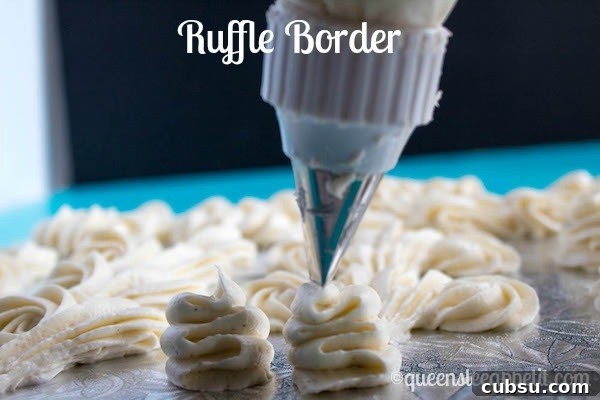
Ruffle Border
- Use a large petal tip and hold it upright at about 90 degrees just above the cake edge.
- Squeeze and move the tip side to side to create cascading ruffles.
- Repeat around the cake for a soft, fabric-like finish.
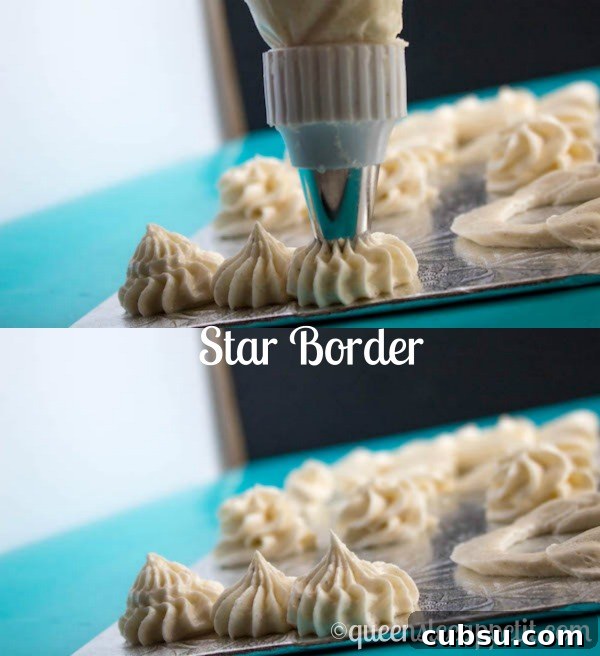
Star Border
- Hold the bag at 90 degrees just above the cake surface.
- Squeeze steadily, then release pressure while lifting to form a pointed star.
- Repeat at even intervals for a tidy star line.
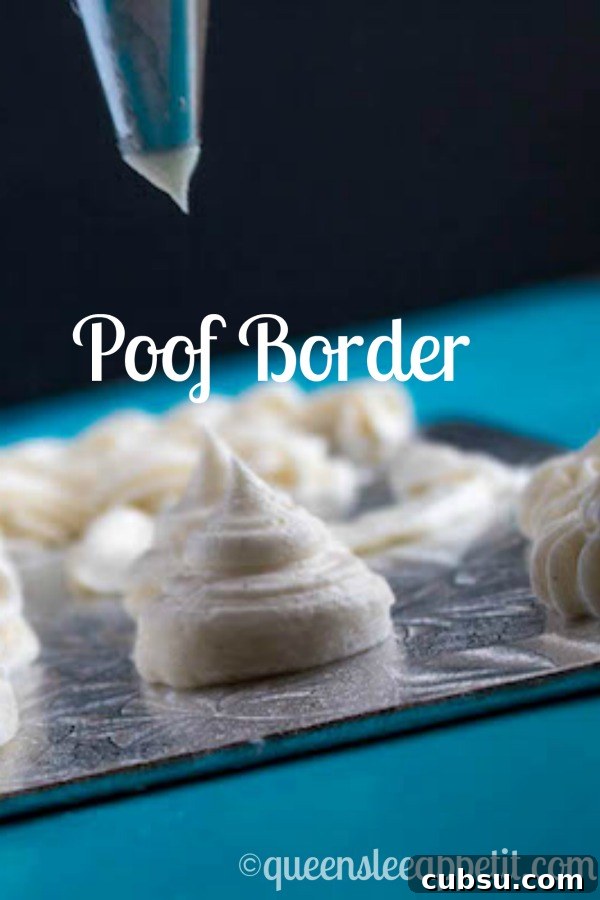
Poof Border
- Using a large round tip, squeeze until the poof reaches the size you want.
- Lift and ease pressure to create a rounded peak, similar to a star but without ridges.
- Space poofs evenly for a playful finish.
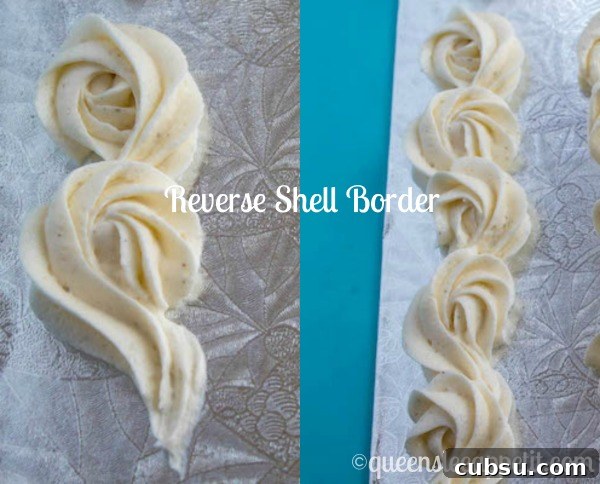
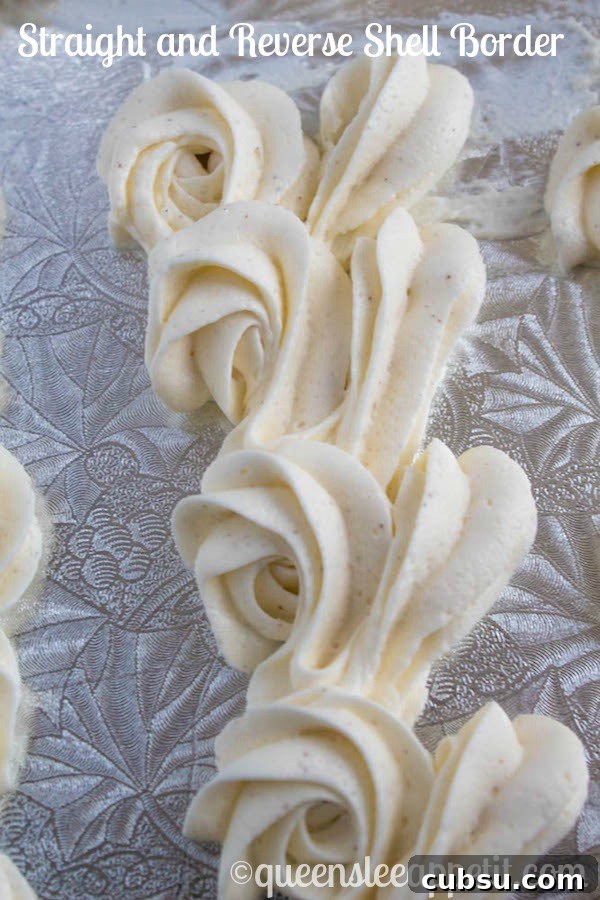
Reverse Shell Border
- Hold the bag at 45 degrees and pipe a motion similar to drawing a small “9” by moving the tip counter-clockwise, then pull away to form a tail.
- Alternate direction on the next shell so shells face each other and create an interesting texture.
- Continue alternating around the cake.
Straight and Reverse Shell Combination
- Pipe reverse shells as described above, then add a row of basic shells directly beside them to create contrast and depth.
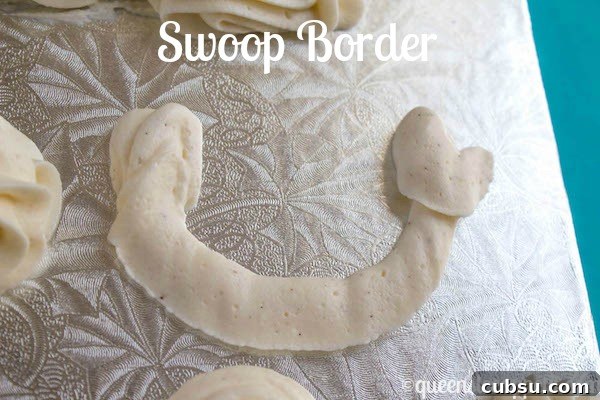
“Swoop” or “Banner” Border
- Hold the bag with the tip facing up the side of the cake and pipe a small mound, then add more frosting on top to build height.
- Create a smooth U-shaped swoop and release pressure at the end to form the tail.
- Start the next swoop where the previous tail ends for a flowing banner effect.
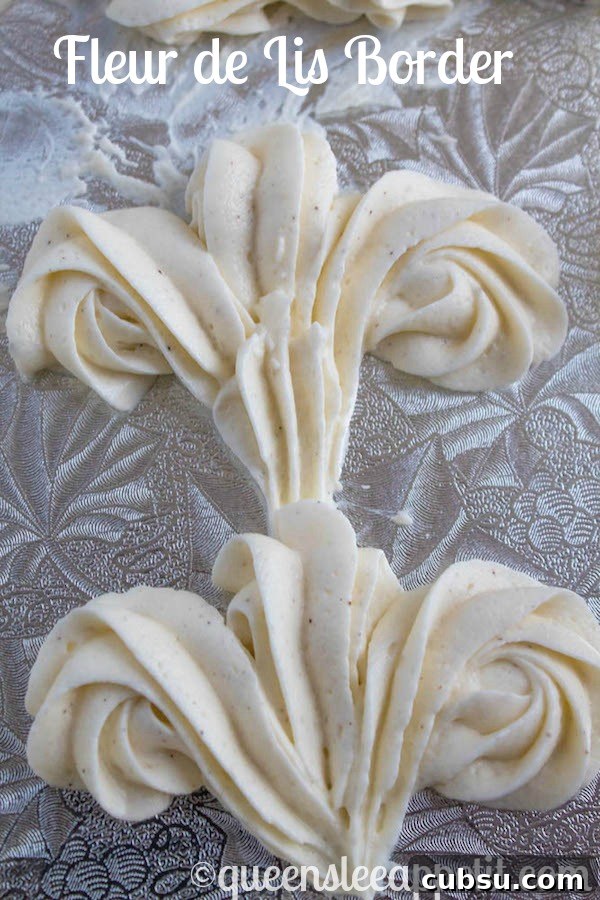
Fleur De Lis Border
- Pipe a basic shell with an elongated center tail, then flank it with smaller shells or reverse shells to create the fleur-de-lis motif.
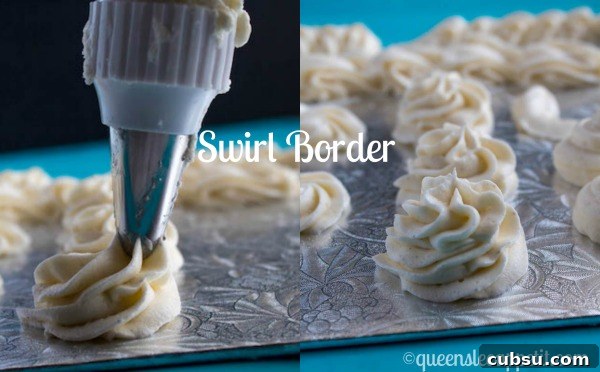
Swirl Border
- Hold the bag at 90 degrees and pipe a cupcake-style swirl.
- Lift and ease pressure to finish with a soft peak.
- Repeat at even spacing around the cake for a whimsical edge.
Practice on real cakes
Once you feel comfortable, try these techniques on a real frosted cake. Practicing on parchment squares first helps, but working directly on a cake teaches you how the frosting behaves on an actual surface. Start with simple borders like shells or stars, then combine styles as you gain confidence.
>>Pin Me For Later<<